

Upgrade from WAClient WHMCS 3.x
Create a new WAClient connection, copy your 3.x templates into Hub, then deactivate the old addon and install the Connector.
Use this if you still run WAClient 3.x on WHMCS and need the new WAClient Connector. This is a clean replace — not an overwrite of the old folder.
1. Create the connection in WAClient
In WAClient open Integrations → WHMCS, add a connection (Web or Cloud), pick the WhatsApp account(s), and save. Keep the Connection ID and Secret for later.
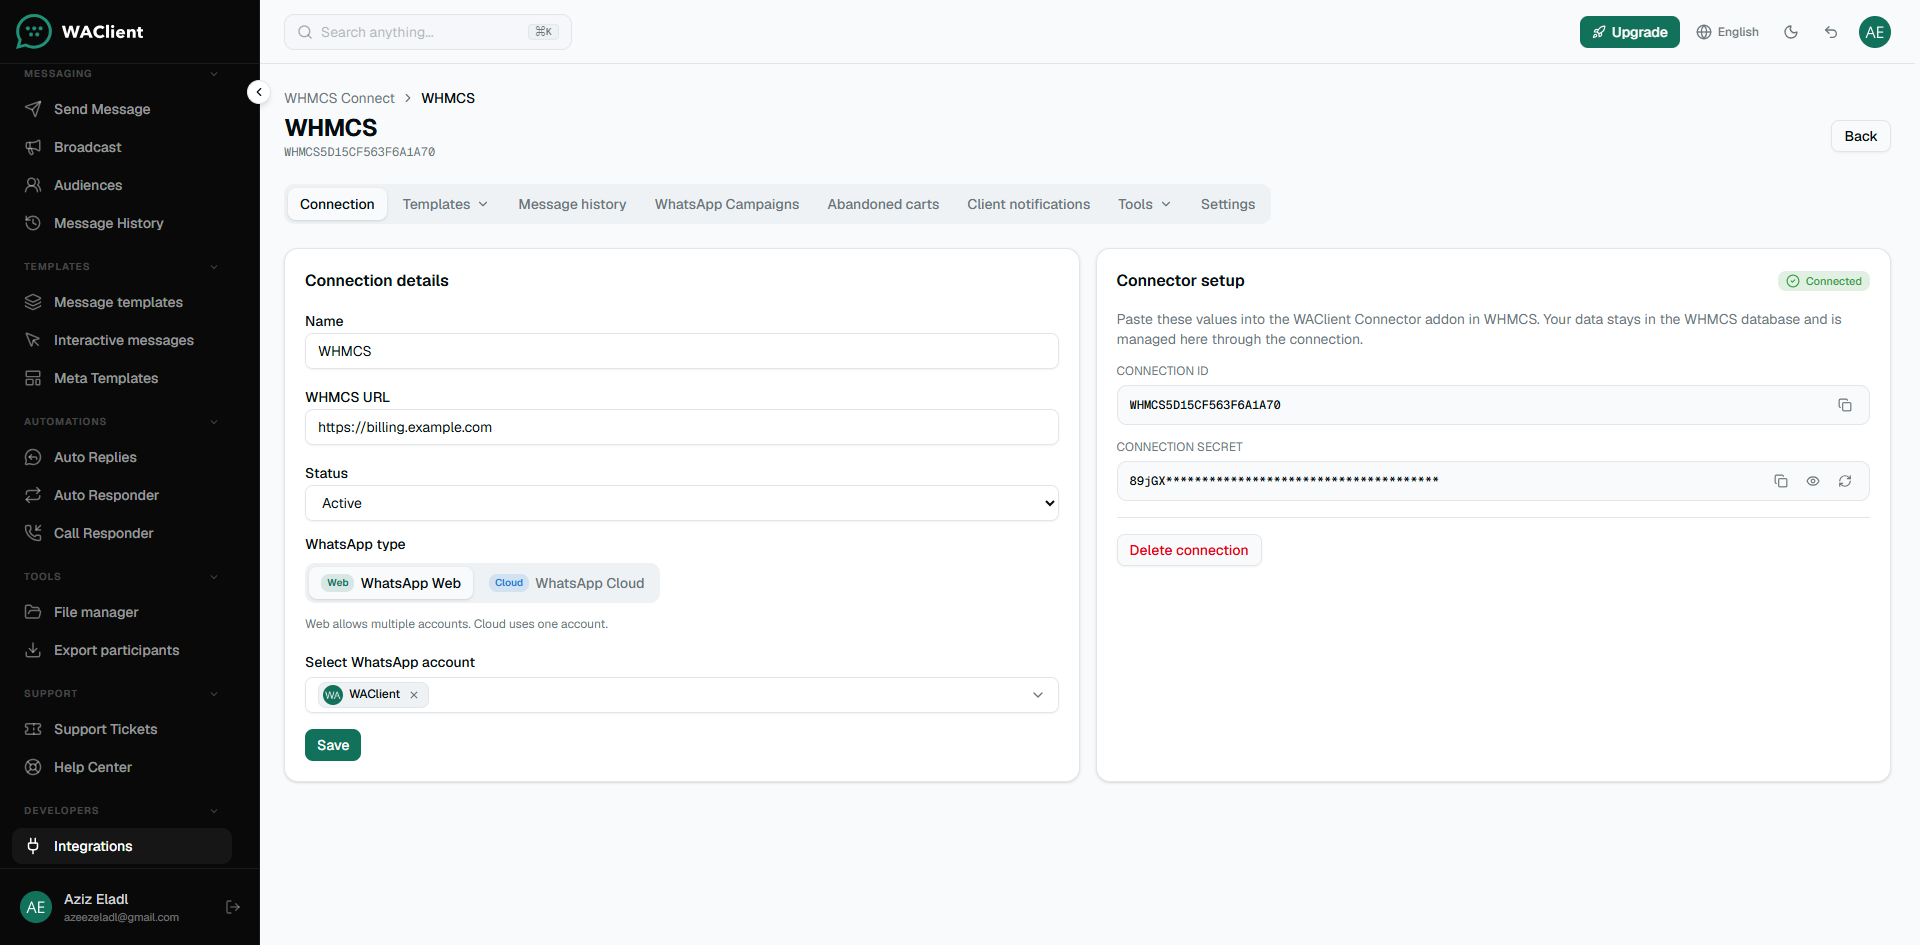
Details: Connect WHMCS to WAClient · WhatsApp Web vs Cloud for WHMCS
2. Copy templates into Hub
Keep the old 3.x module open in one browser tab. In another tab, open the new connection in Hub → Client templates, Admin templates, and OTP.
Copy each customized message from 3.x and paste it into the matching Hub template, then save. When you paste, update variables:
{invoice_payment_link}→{invoice_link}{invoice_direct_link}→{invoice_access_link}{quote_direct_link}→{quote_access_link}{ticket_direct_link}→{ticket_access_link}
Details: Set up WHMCS notification templates
3. Deactivate the old module
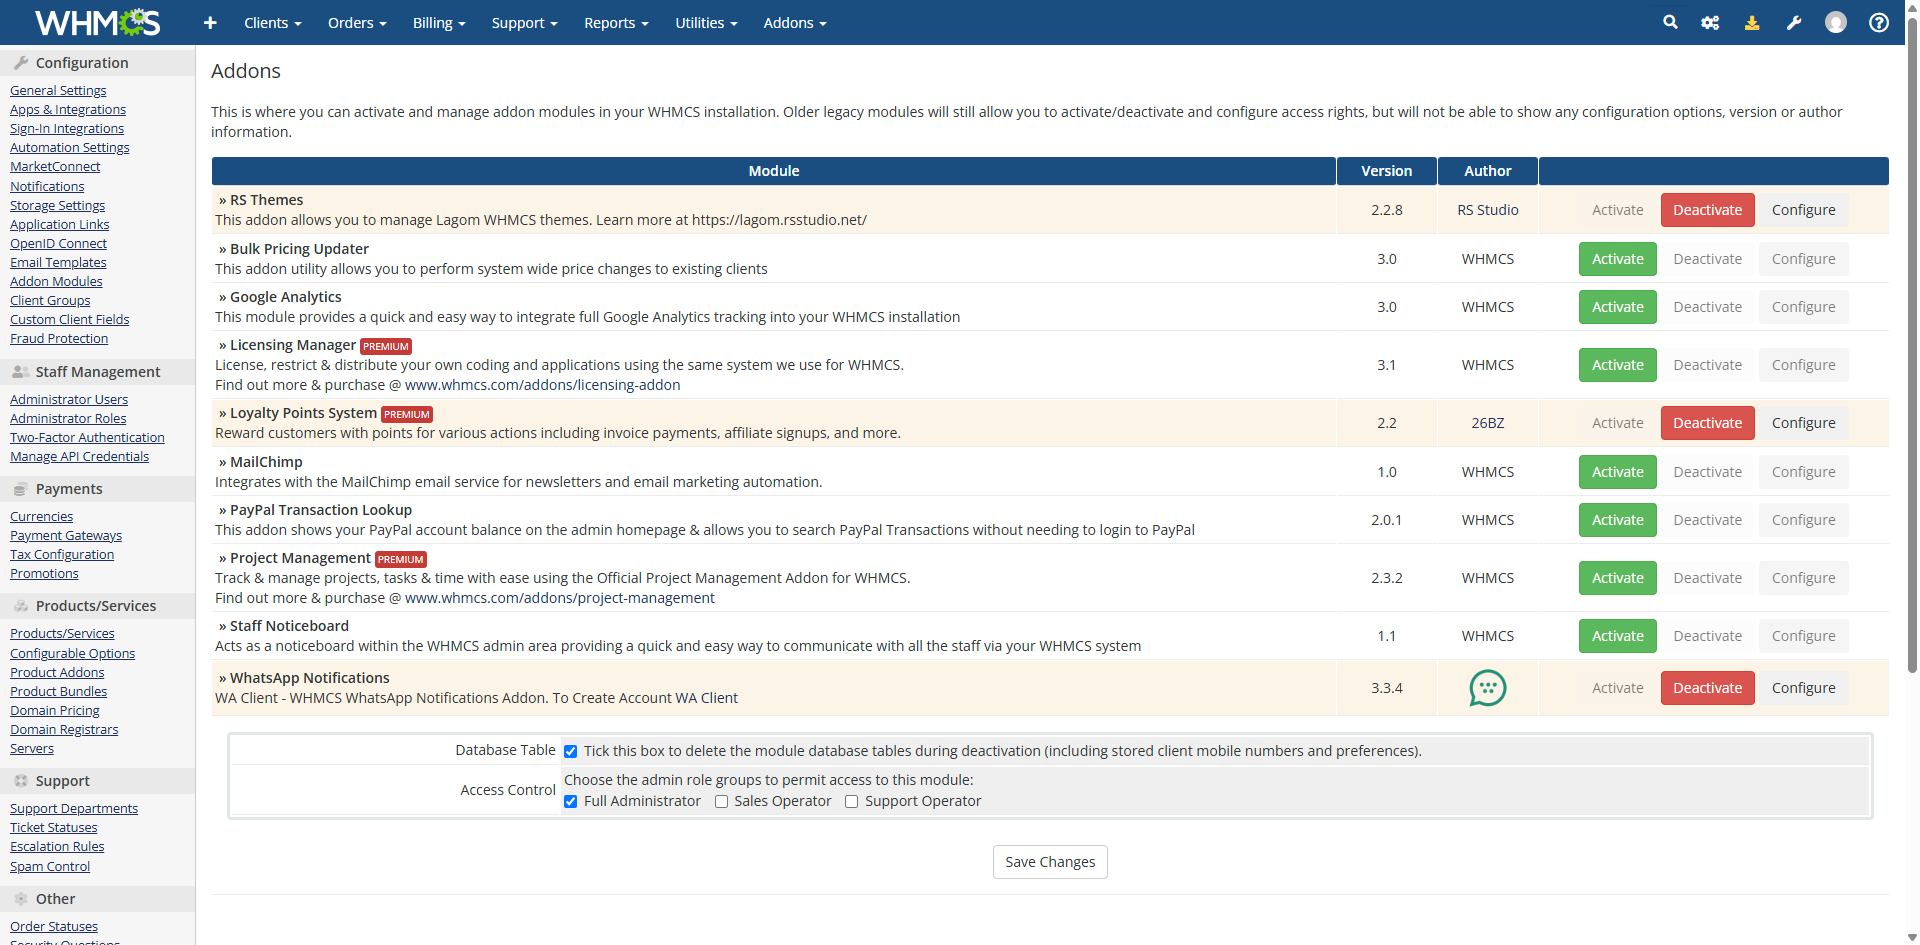
- WHMCS → Addon Modules → old WAClient → Configure.
- Tick: Tick this box to delete the module database tables during deactivation (including stored client mobile numbers and preferences).
- Deactivate.
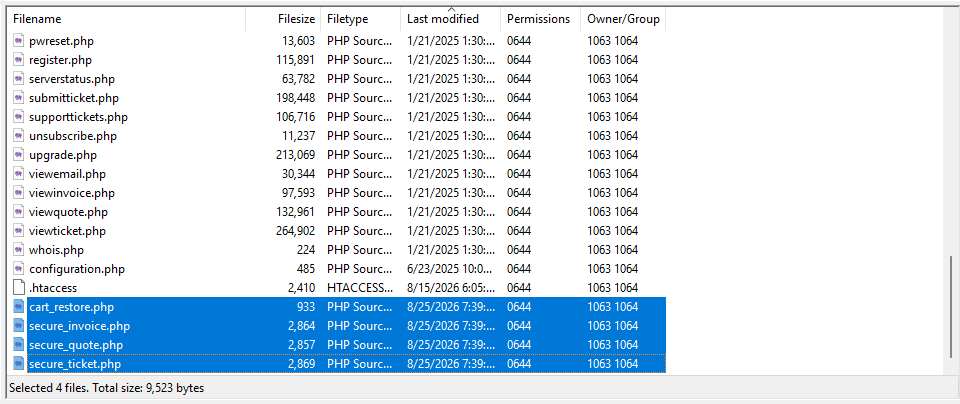
4. Delete old files
Remove:
modules/addons/waclient/(entire folder)- From WHMCS root, if present:
cart_restore.php,secure_invoice.php,secure_quote.php,secure_ticket.php
5. Install the new Connector and connect
- Upload the new
modules/addons/waclient/folder. - Copy
redirect.phpandrestore.phpfrom the package into the WHMCS root. - Activate the addon → paste Connection ID + Secret → Connect.
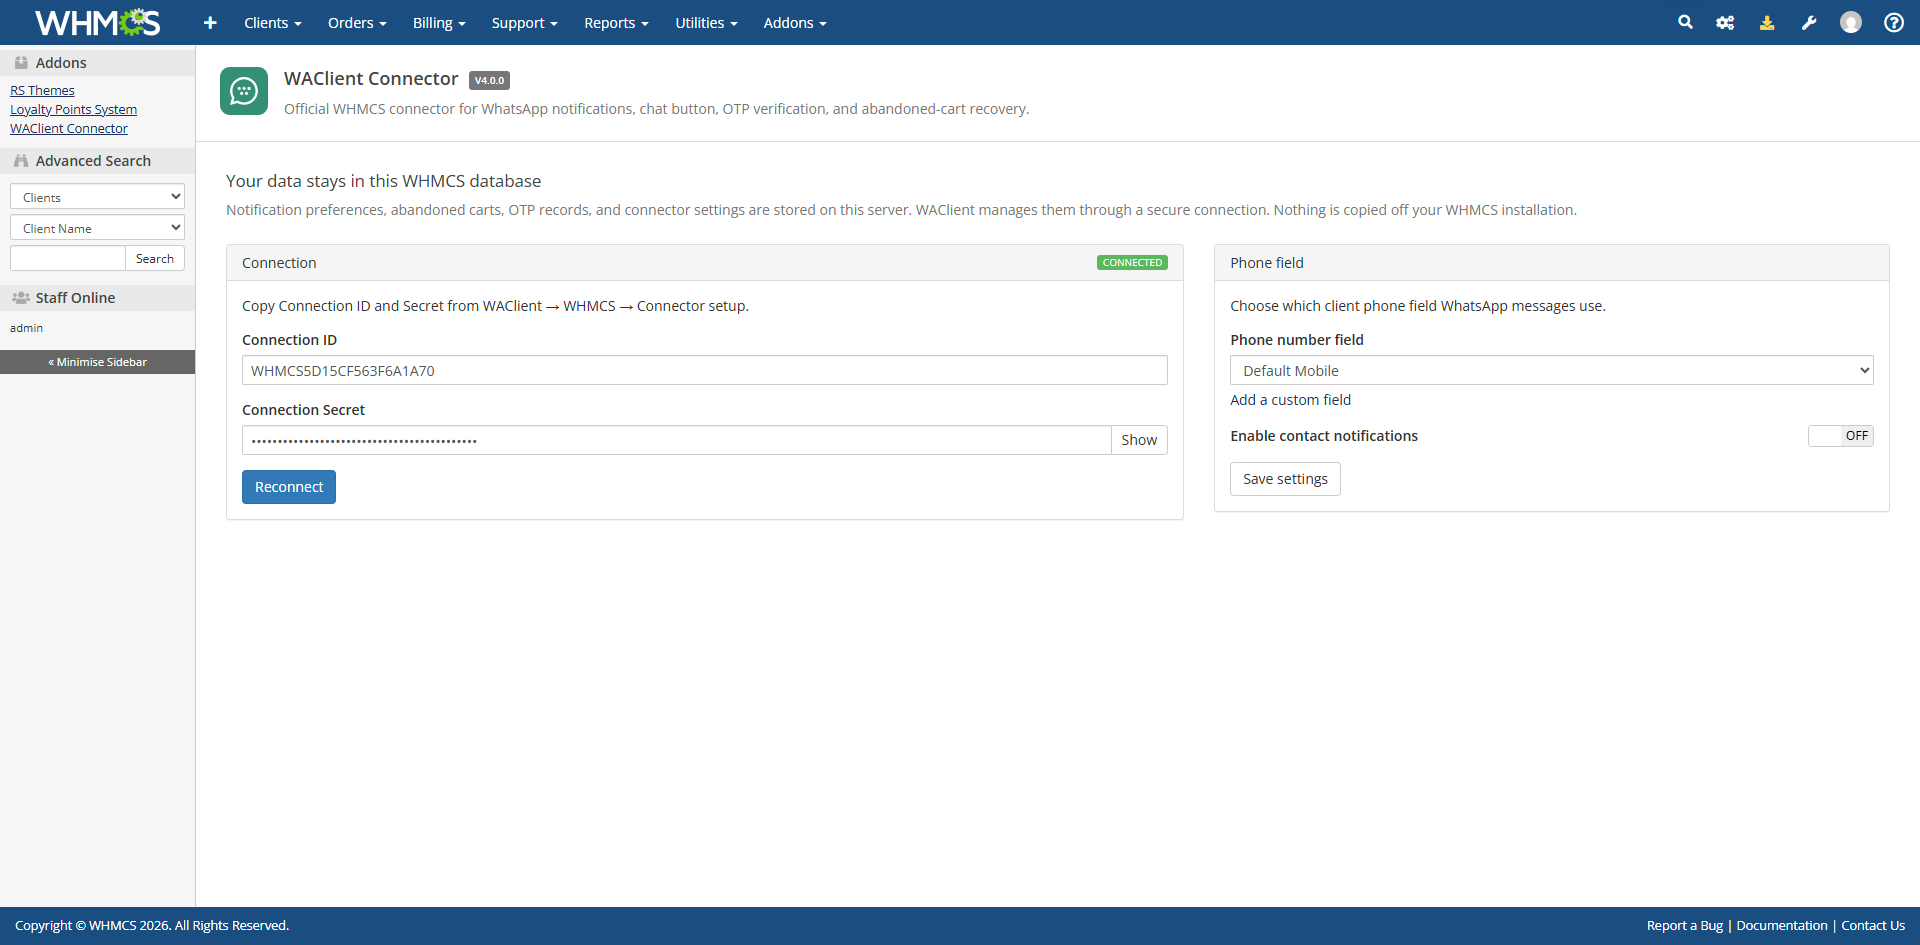
Full install steps: Connect WHMCS to WAClient
6. Finish setup
Complete the remaining guides for this connection:
- One-click invoice, quote, and ticket links
- Client area OTP over WhatsApp
- Abandoned cart WhatsApp reminders
- Phone numbers, contacts, and client notification preferences
- Add a WhatsApp chat button to the WHMCS client area
- WhatsApp campaigns for WHMCS clients
- Send WhatsApp from a WHMCS client summary
- Export or import a WHMCS connection (optional backup after everything works)